

Gutter Cleaning Module

Equipment Needed
1 or 2 5-Gallon Buckets
Gloves (preferably waterproof knit gloves for mobility)
Gutter Spoon
Extension Pole
Leaf Blower
Multi-purpose Sponge
Rags
Safety Harness/Ladders
Gutter Cleaning procedure
Roof Blow
Hand-Scooping
Minor Repairs
Watertest
Property Clean-Up


1. Roof Blow
The first step in any gutter cleaning is a leaf blow of the roof to remove any loose debris. You’ll begin from the peak of the roof, blowing down the loose debris into the gutters. Take care that the roof debris does not shower down onto sensitive areas on the property: vehicles, gardens, water features, turf, etc.
Direction of leaf blowing: overtime you will get more comfortable with using a the leaf blower, but in general take extra precaution and care to be aware of what you are leaf blowing (wet debris, chipped paint, fragile plants) and in which direction you are leaf blowing. It is especially important to not divert the debris towards the siding of the building, thereby ensuring the areas remains clean.
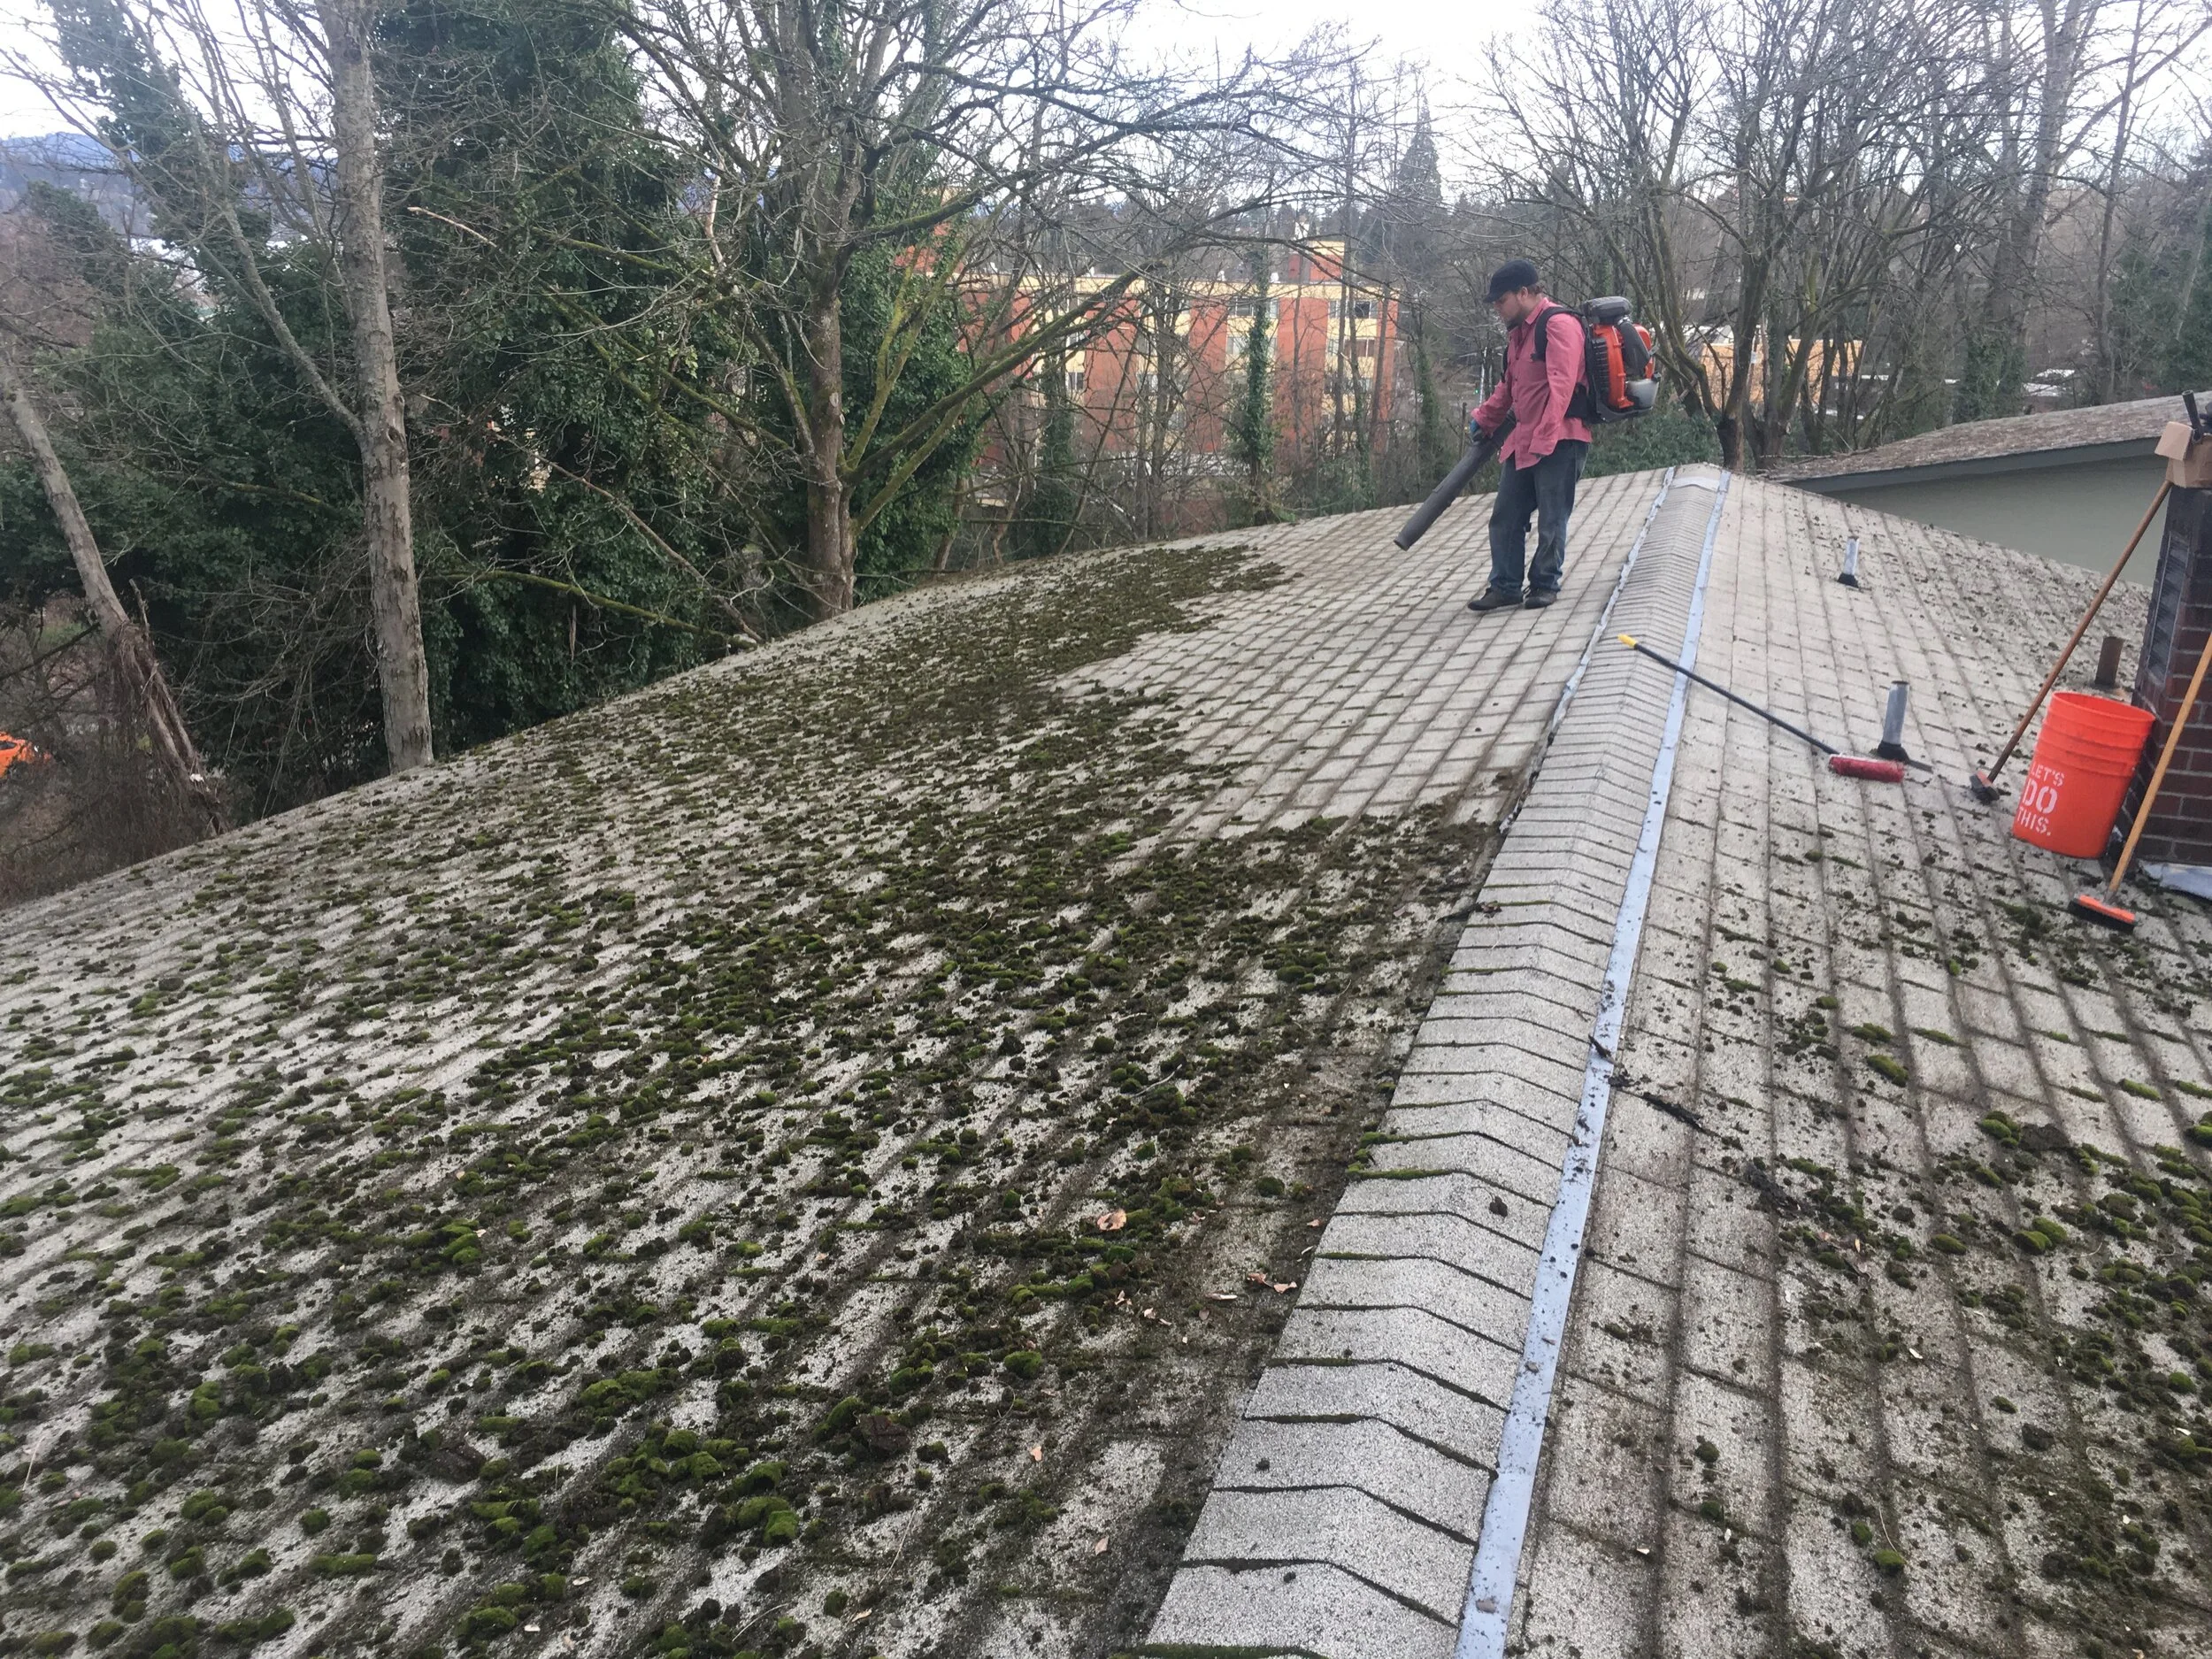
For multi-level roofs, leaf blow about a foot above the siding to divert debris backwards you. Blowing sideways along the siding will kick the debris towards the siding and potentially cause mess.
Never leaf blow upwards on the roof. The lamination of shingles edges will be compromised if you leaf blow upwards into the shingles. You’ll begin to see them flap with the blown air. Take caution to leaf blow from the peak of the roof downwards.
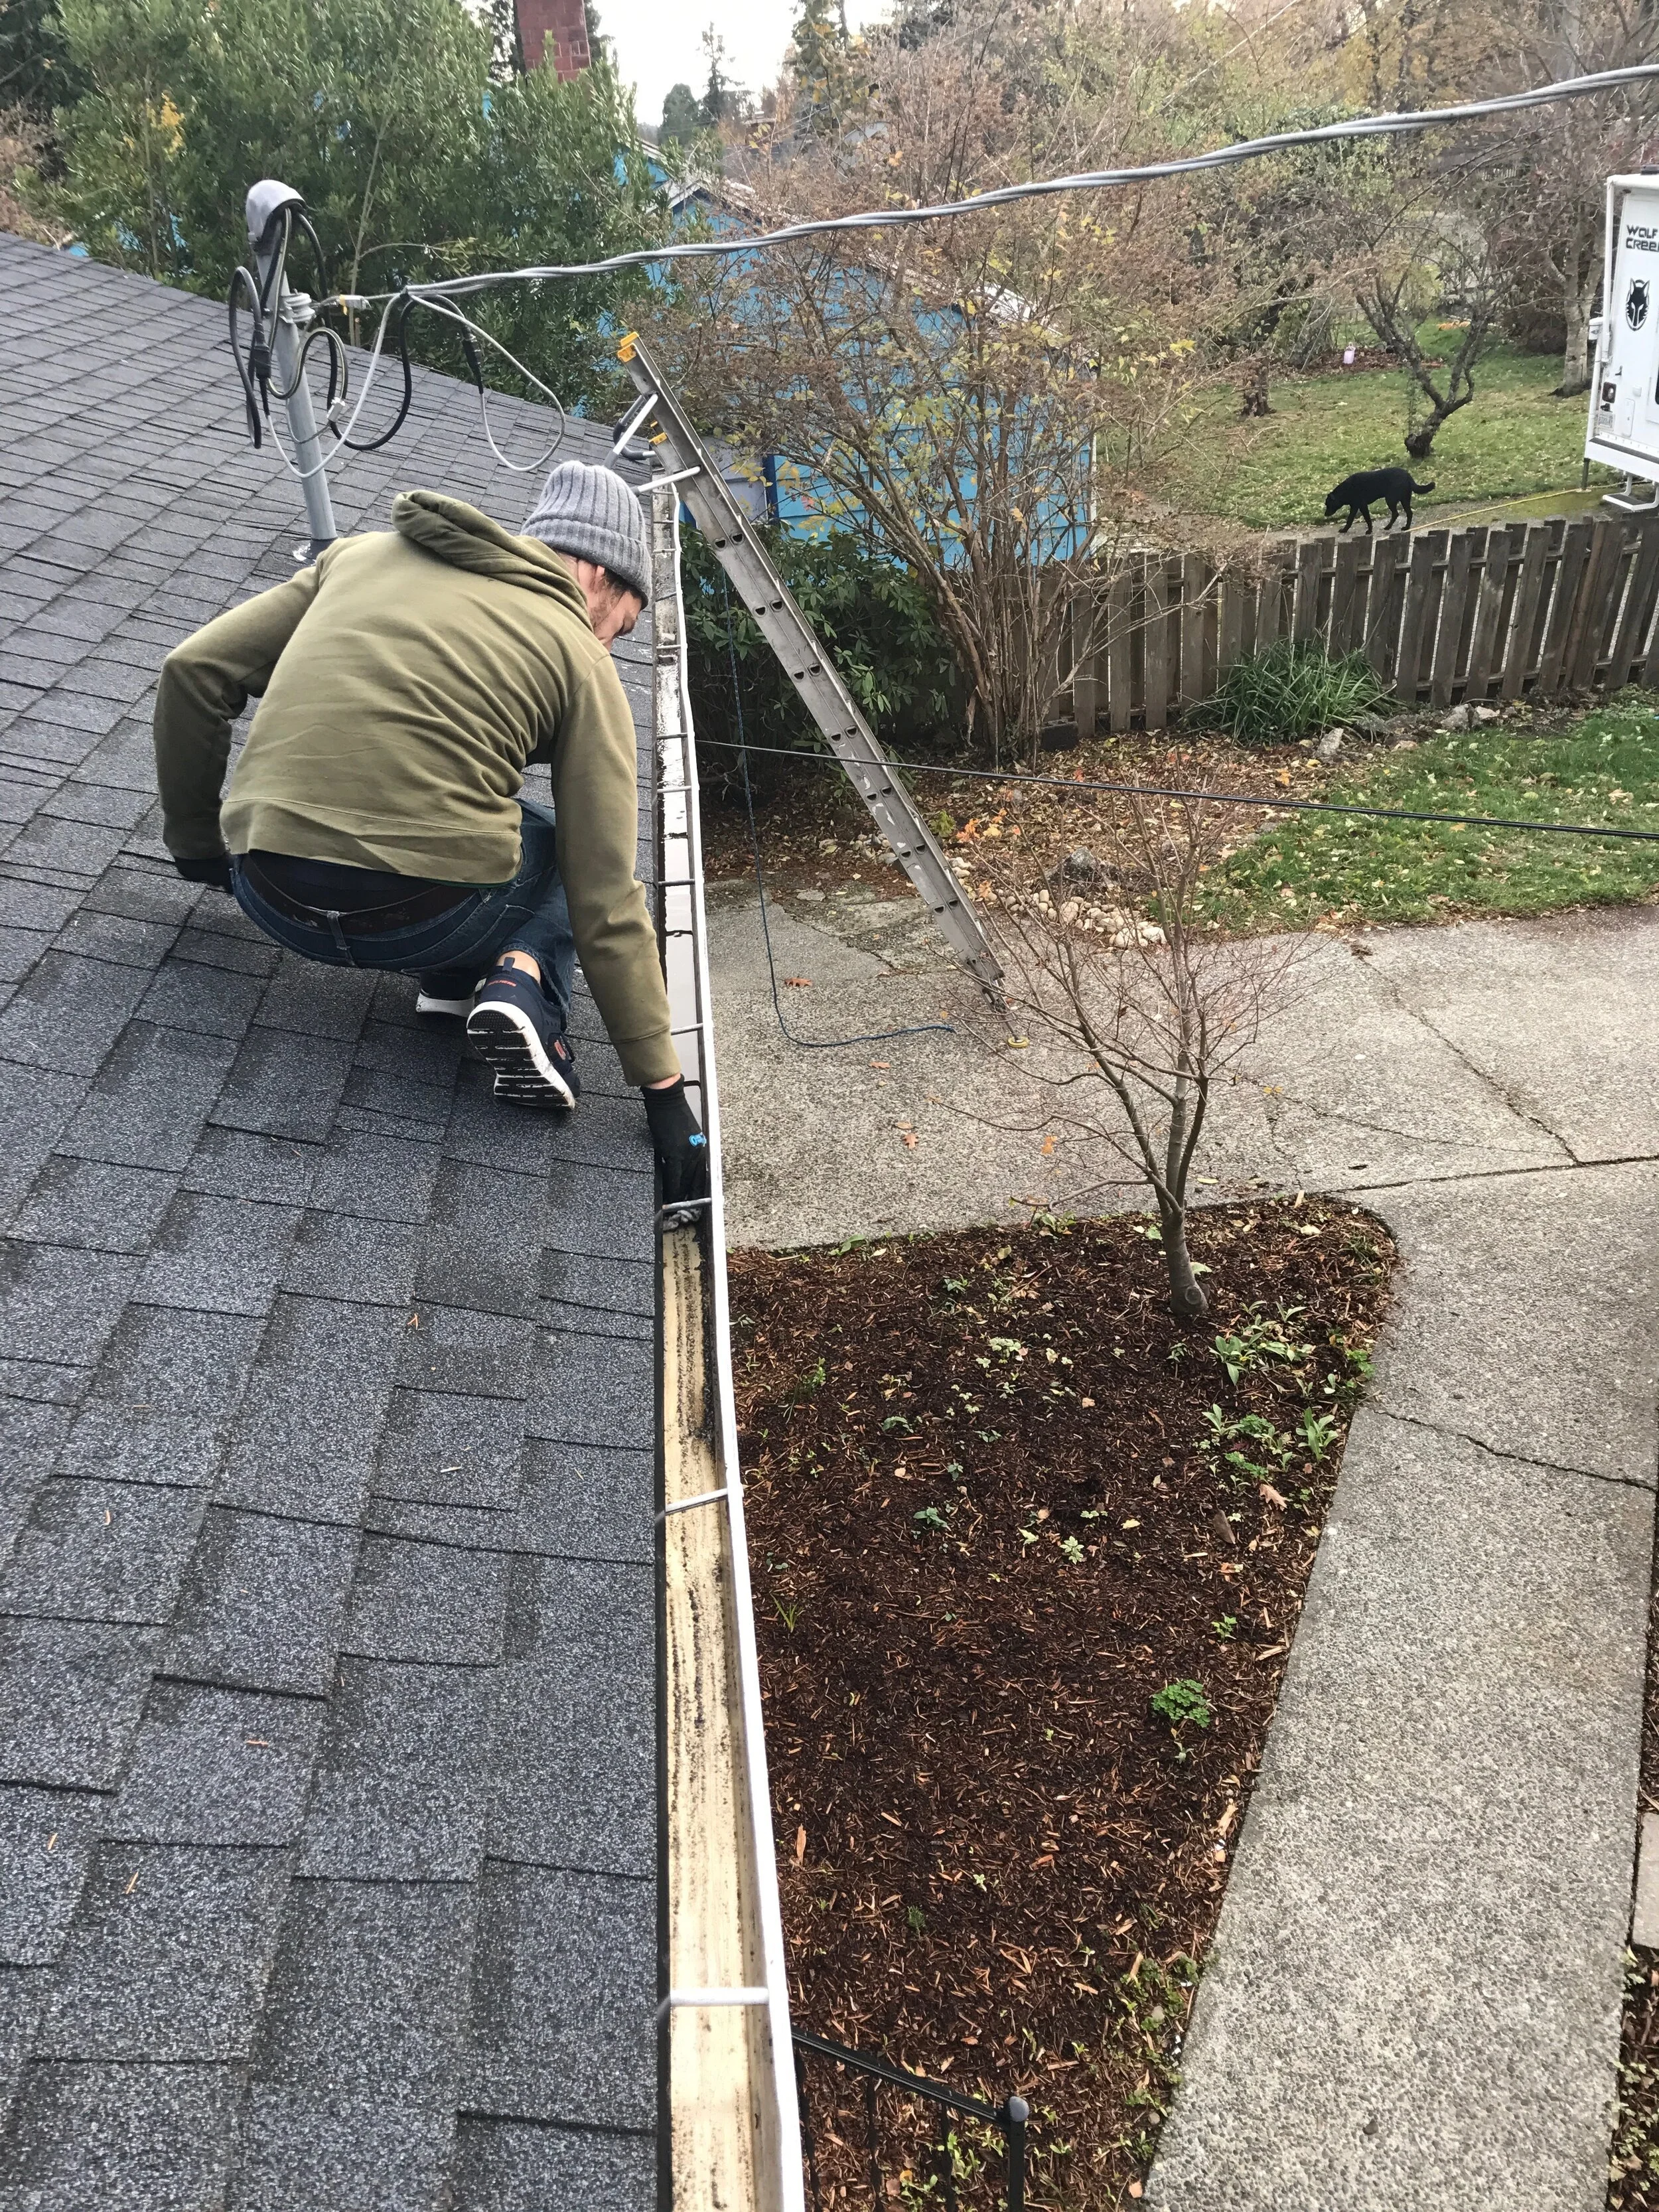
2. Hand-scooping
Gu-Wi sets itself apart from our competition because we hand-scoop the gutters clear, rather than leaf blow. We do not leaf blow gutters for many reason: it creates a huge mess on the property down below, the debris gets between the fascia and the gutters eventually rotting out the fascia boards, and the debris is splashed onto the soffit underneath making an unsightly mess when looking at the eave from below.
Hand-scooping may take extra time, but the preserving the integrity and aesthetics of the property is of the utmost importance. We are a cleaning company after all :)
Work from the end of the run (or low point) to the downspout, hand-scooping debris into the 5-Gallon bucket. It is good practice to drag a rag or sponge behind as you scoop the gutter debris. The rag or sponge will act as a dam and direct the water towards the downspout. As much as possible, limit the amount of debris that goes down the downspout, as it is likely to clog.
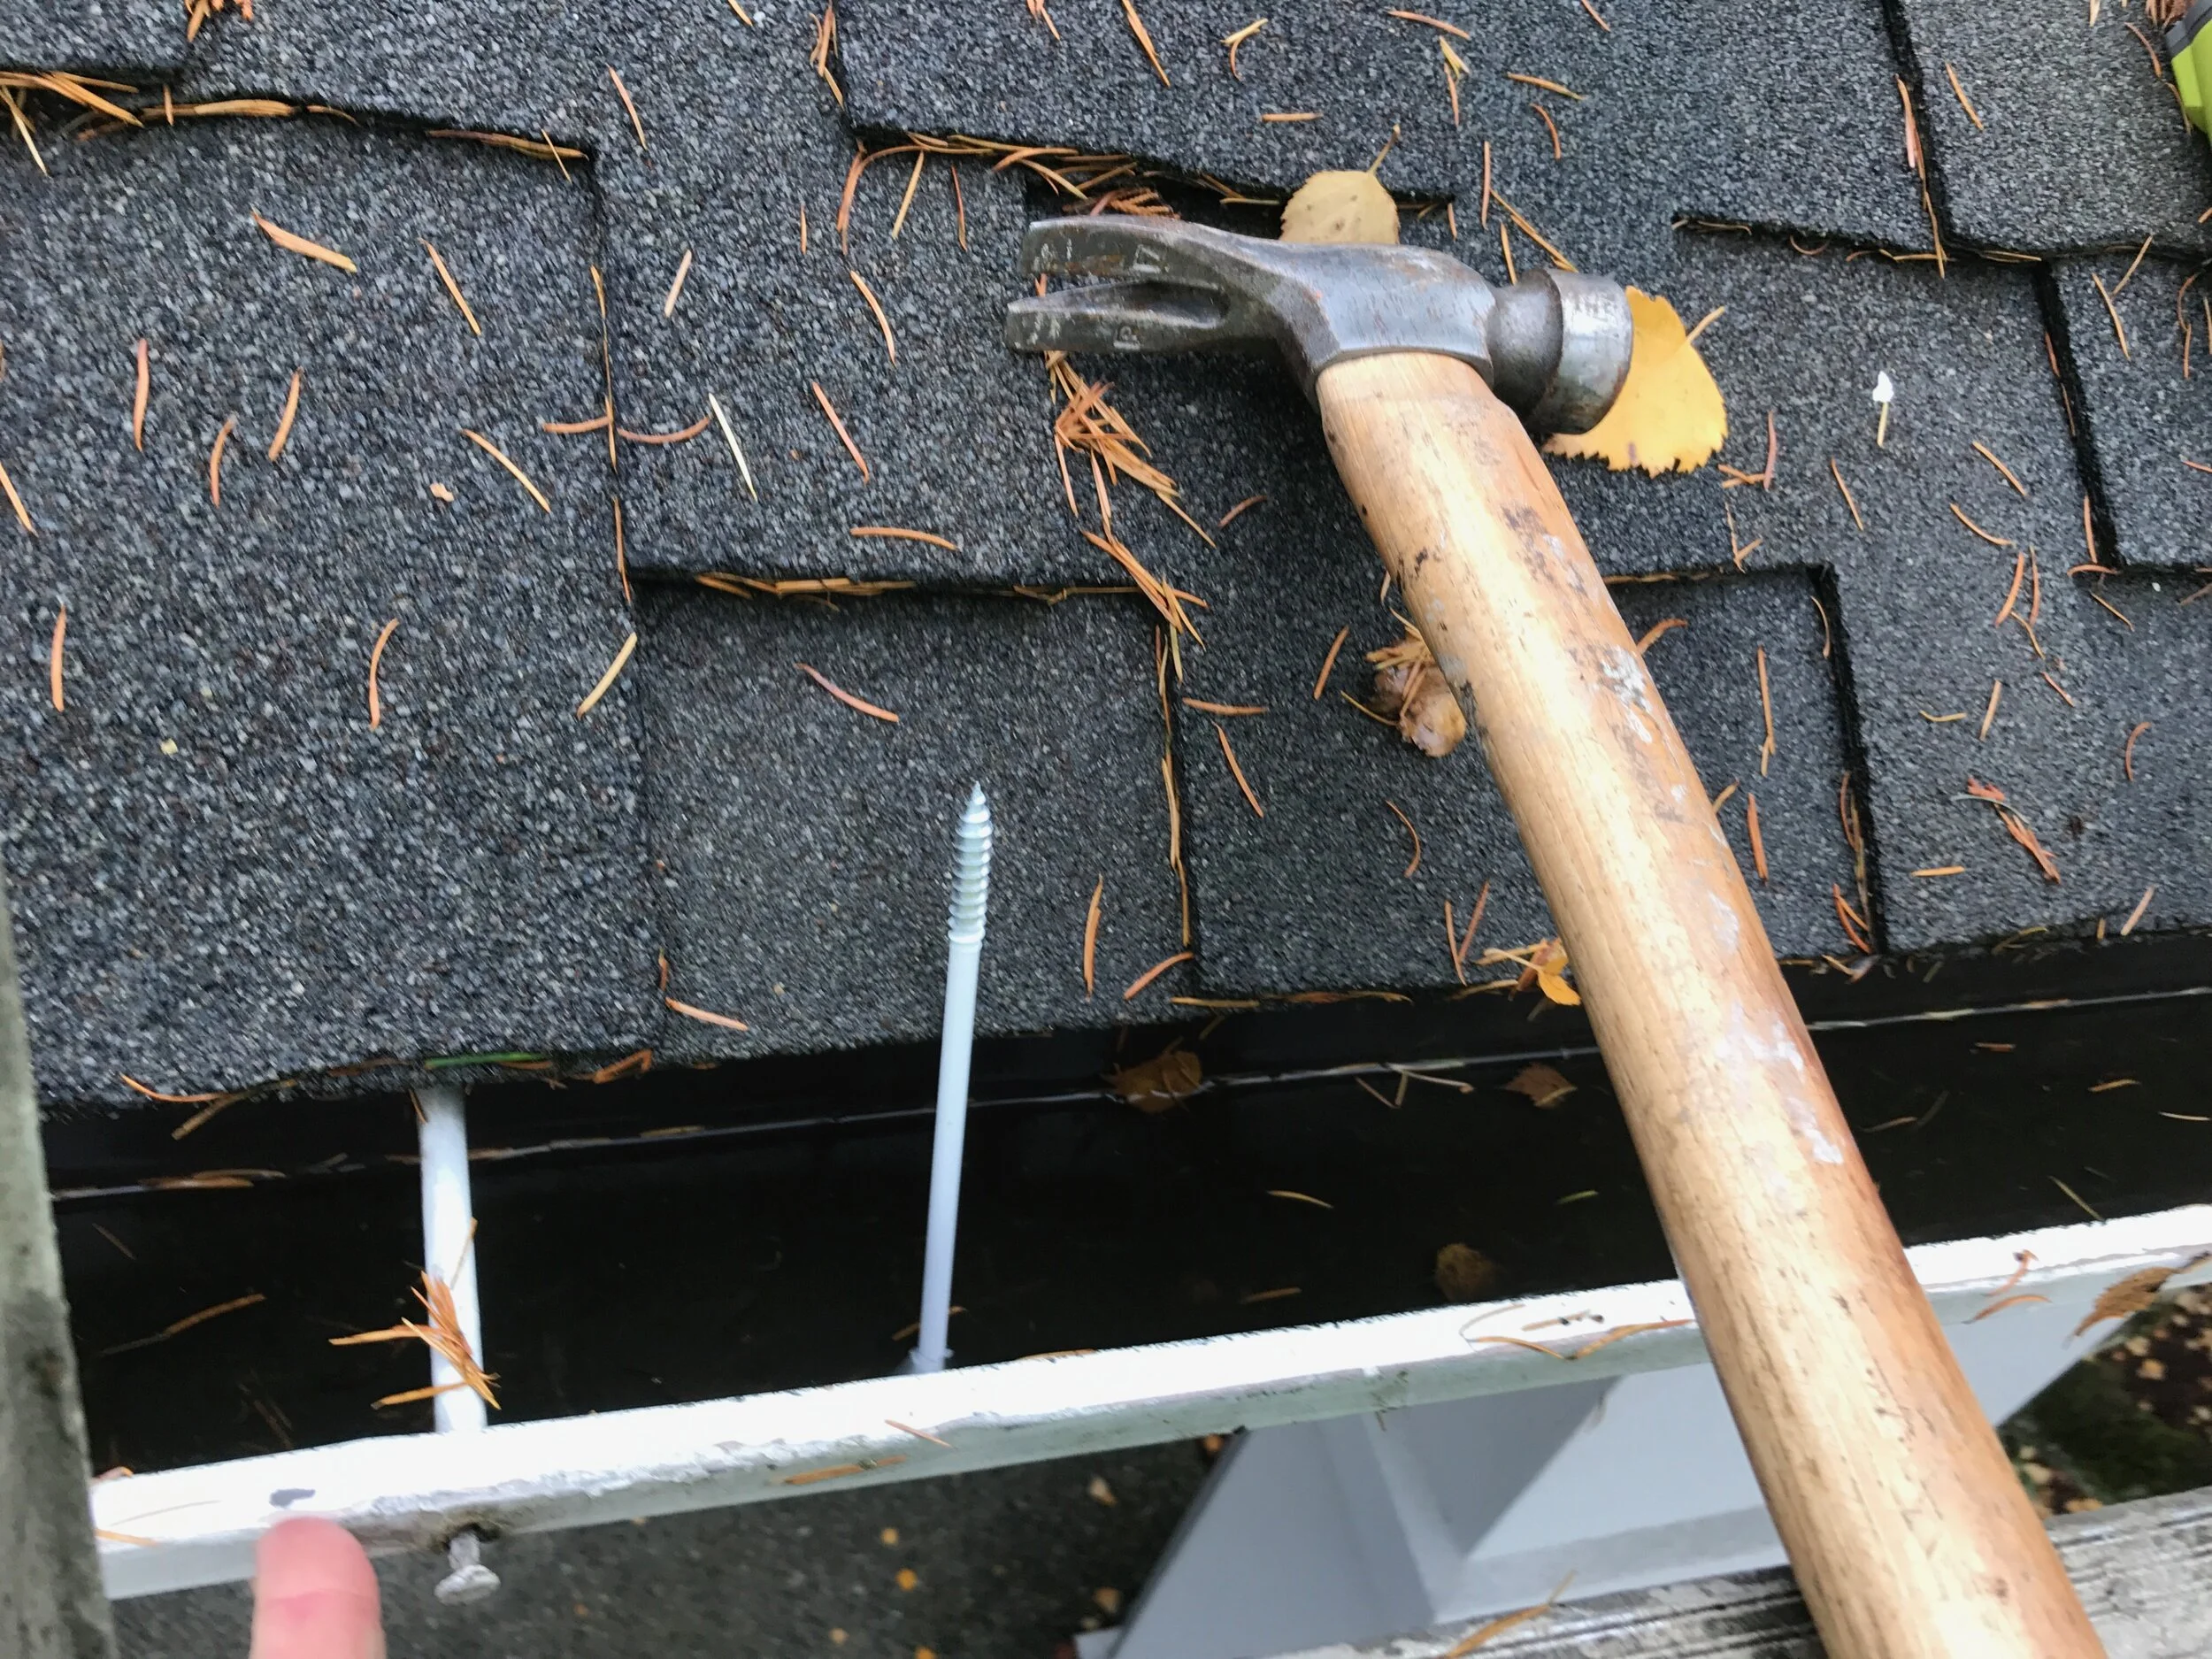

3. Minor Repairs
Complimentary with all gutter cleanings are minor repairs including:
Resecuring loose gutters
Reattaching detached downspouts
Disassembling downspouts to manually clear a clog
Always keep on-hand white and brown lag bolts, as well as hidden hangers. Too often, when we come out to a house for gutter cleaning we see the gutters begin to fall away from the building. These older-style “spike-and-ferrel” gutter nails have no threading and will pull themselves out of their holes overtime.
The repair for this is to replace the nail with threaded lag bolts to hold the gutter secure. If ever the system has hidden hangers (no visible nails or screws on the front face of the gutter) you must resecure the gutter with hidden hangers. You may need to place the new screws slightly off-set in order to grip non-rotted wood behind the gutter.
Pay special attention to the wood you are drilling into behind the gutter. Screws should not be poking through the backside of the fascia. Rather, find the rafter tail and drill into that supporting beam.
4. Watertest
asdf awthdb